Documents & Contracts: Managing Your Digital Paperwork
Why You Need This Tool
In business, paperwork like contracts, agreements, and waivers is inevitable. Managing these manually is slow, unprofessional, and prone to loss. The Pondo (our Pondocean system) provides a professional, digital way to create, send, and track these documents in real-time. This system ensures you know exactly when a client has viewed your agreement and when they have signed it, replacing "guessing" with a clear digital audit trail.
Step 1: Accessing Your Document Vault
Managing contracts is a high-level administrative task and is best handled on a computer for full control and visibility.
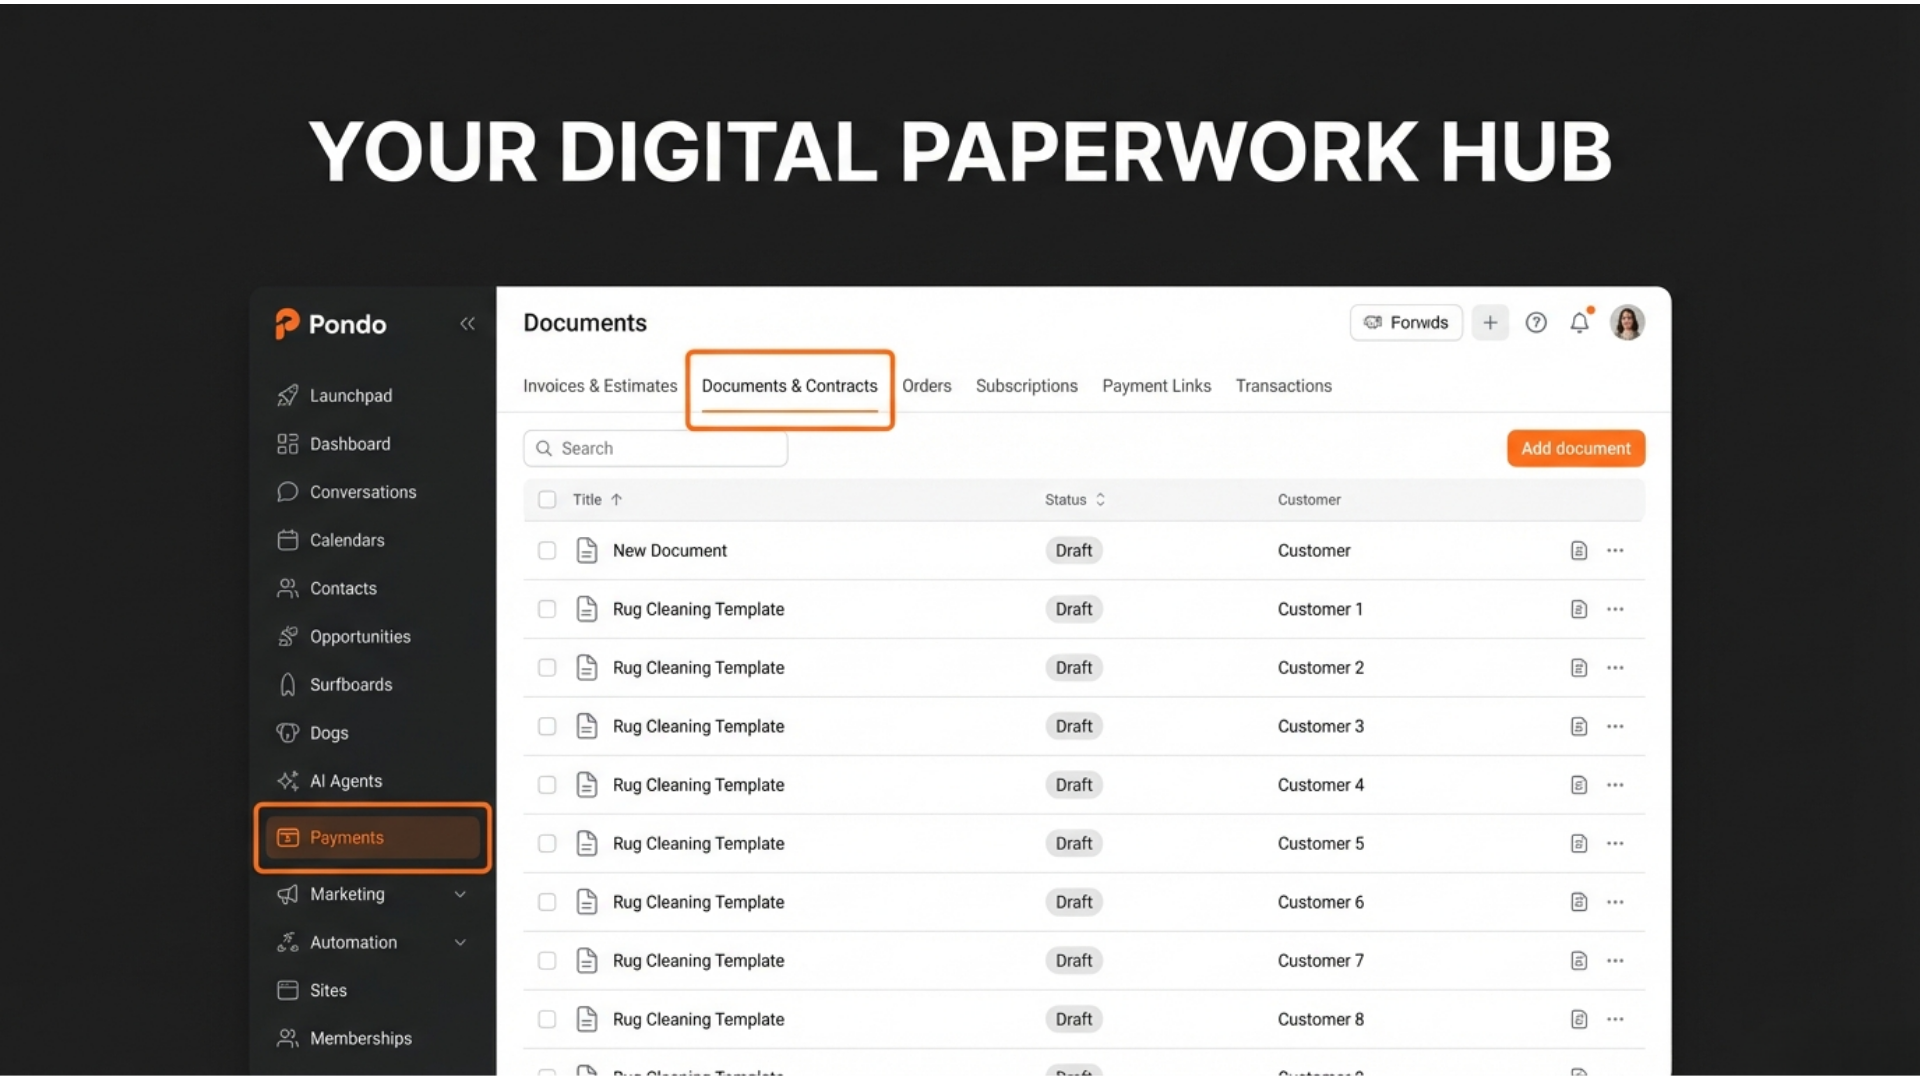
On your Desktop: Look at the left-hand sidebar menu and click on Payments.
Navigate to Documents: At the top of the main screen, click the Documents & Contracts tab. This is your primary library where you can see every document ever sent, signed, or drafted.
Step 2: Creating a Document (Three Ways to Start)
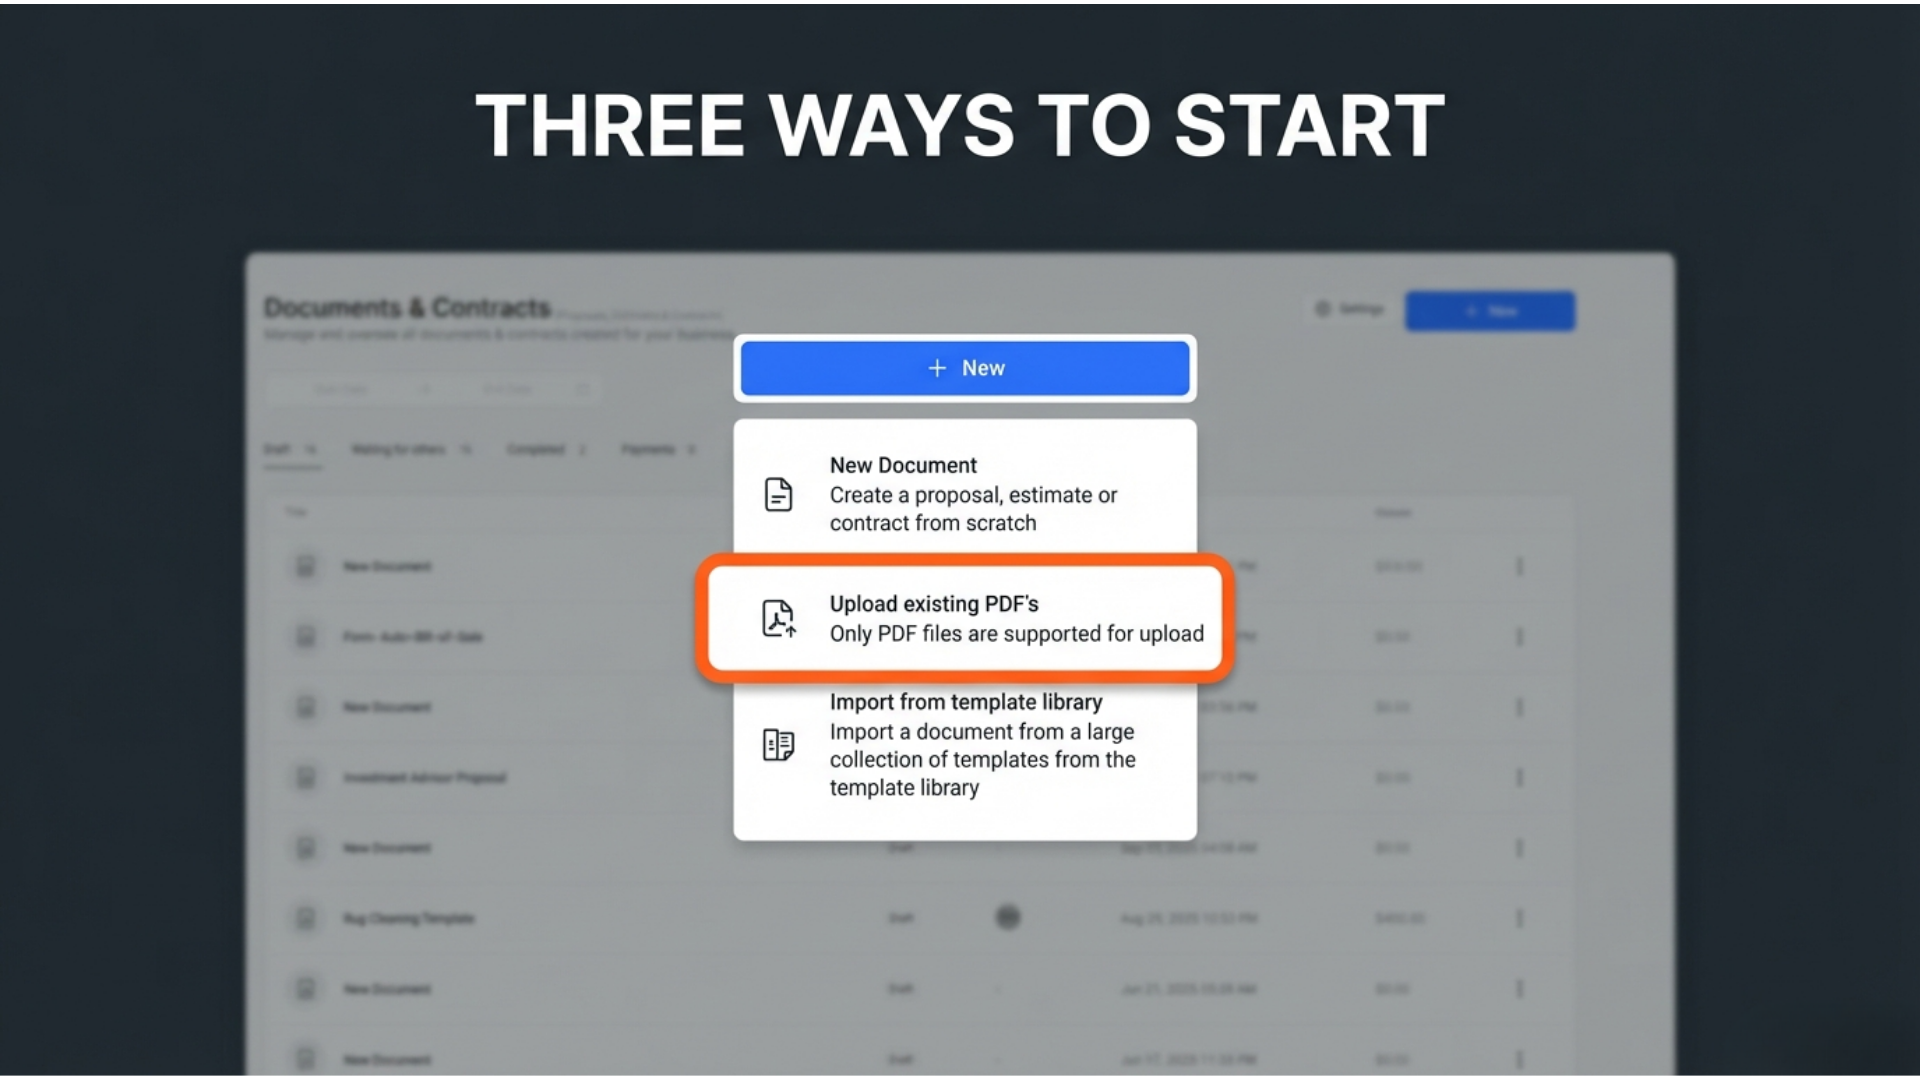
When you are ready to send something new, click the blue + Create New button in the top right corner. A pop-up window will appear with three specific methods to begin:
Blank Document: Use this to type out a brand-new agreement from scratch using our drag-and-drop editor.
Upload PDF: If you already have a contract (like a Word doc saved as a PDF), select this. The system imports your file, and you can simply drop signature boxes on top of your existing text.
Use a Template: If you have already saved a "Master Version" of a contract (see Step 5), select this to save time.
Step 3: Adding "Smart" Elements (Signatures & Dates)
Whether you start blank or upload a PDF, you must tell the system exactly where the person needs to sign.
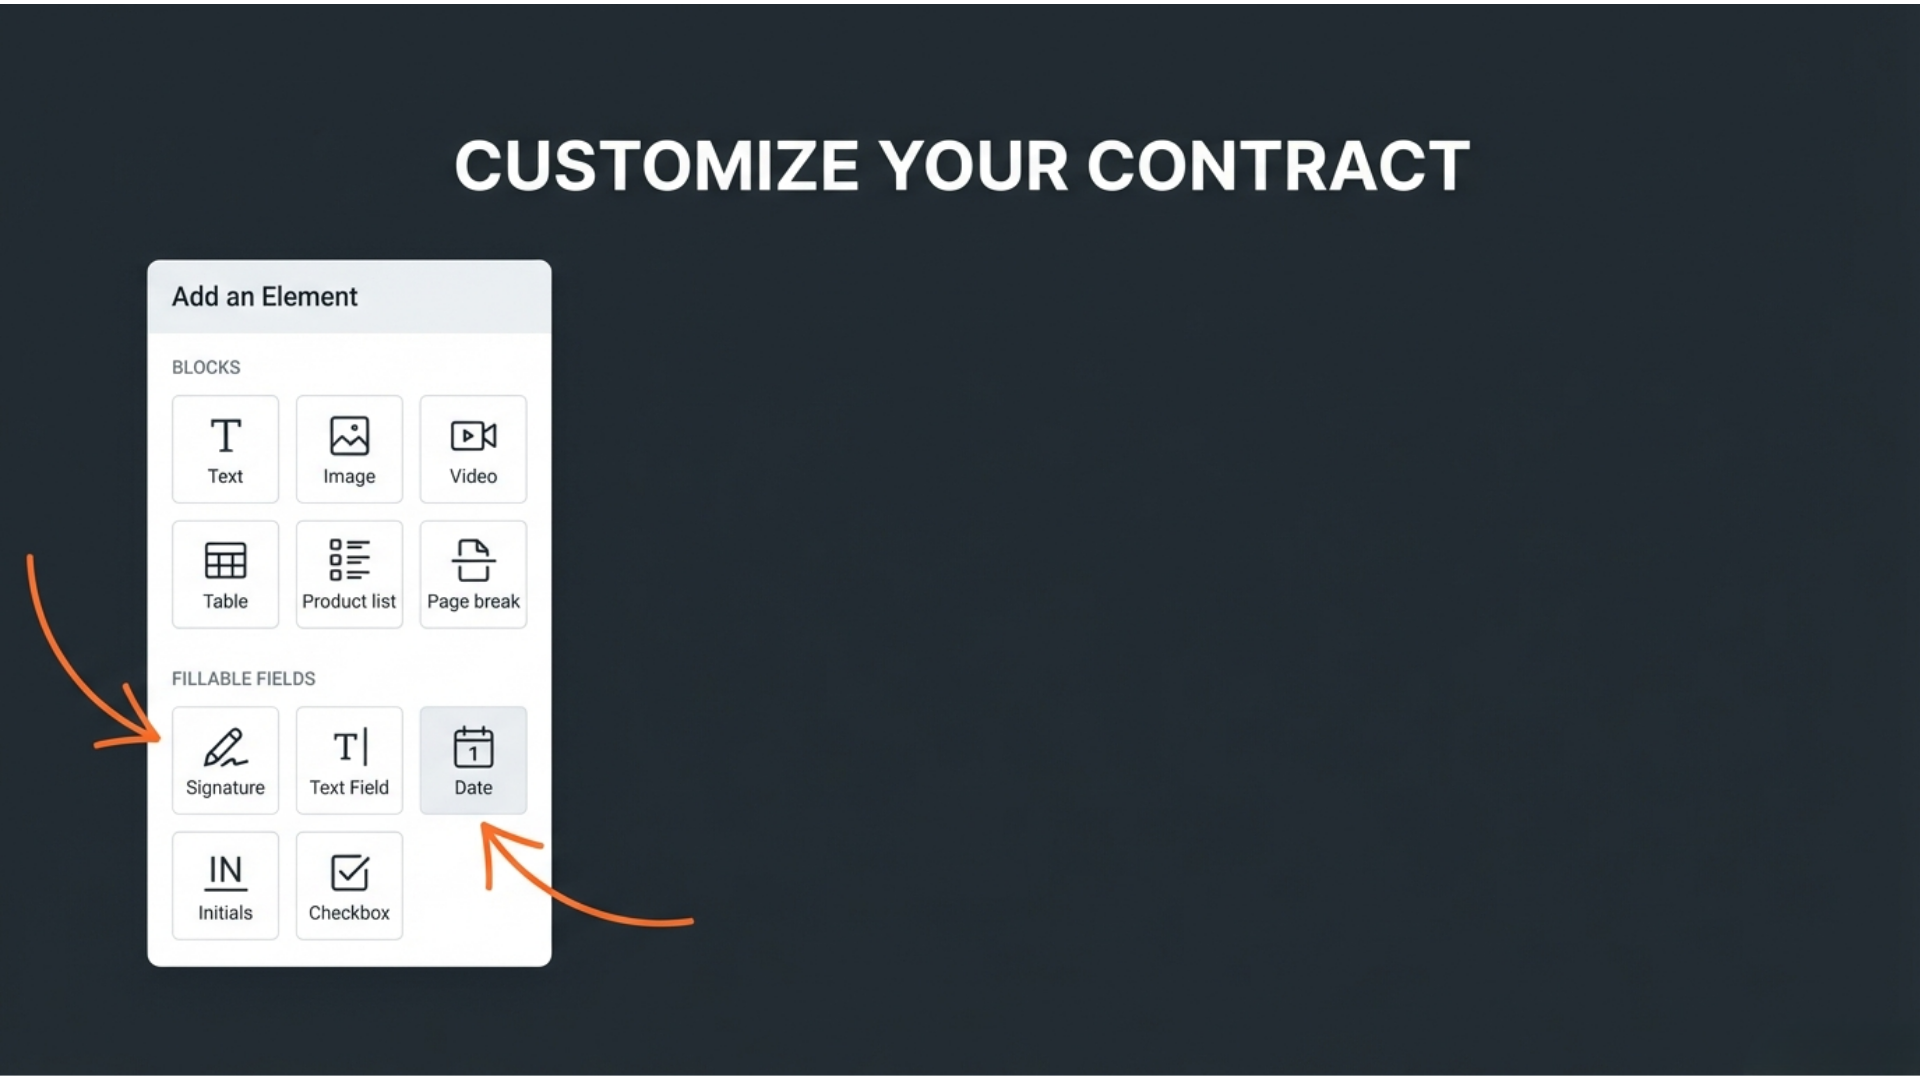
The Elements Sidebar: On the left side of the screen, you will see the "Add an Element" menu.
Fillable Fields: Scroll down to find the signature tools.
The Essentials: Click and drag the Signature, Initials, and Date Signed boxes to the exact spot on the document where they belong.
Text Inputs: If you need the client to type their job title or address, drag a Text Input box onto the page.
Step 4: Identifying Your Recipient (The "Who")
The system needs to know exactly who is receiving this document so it can track their unique signature and send them a copy once finished.
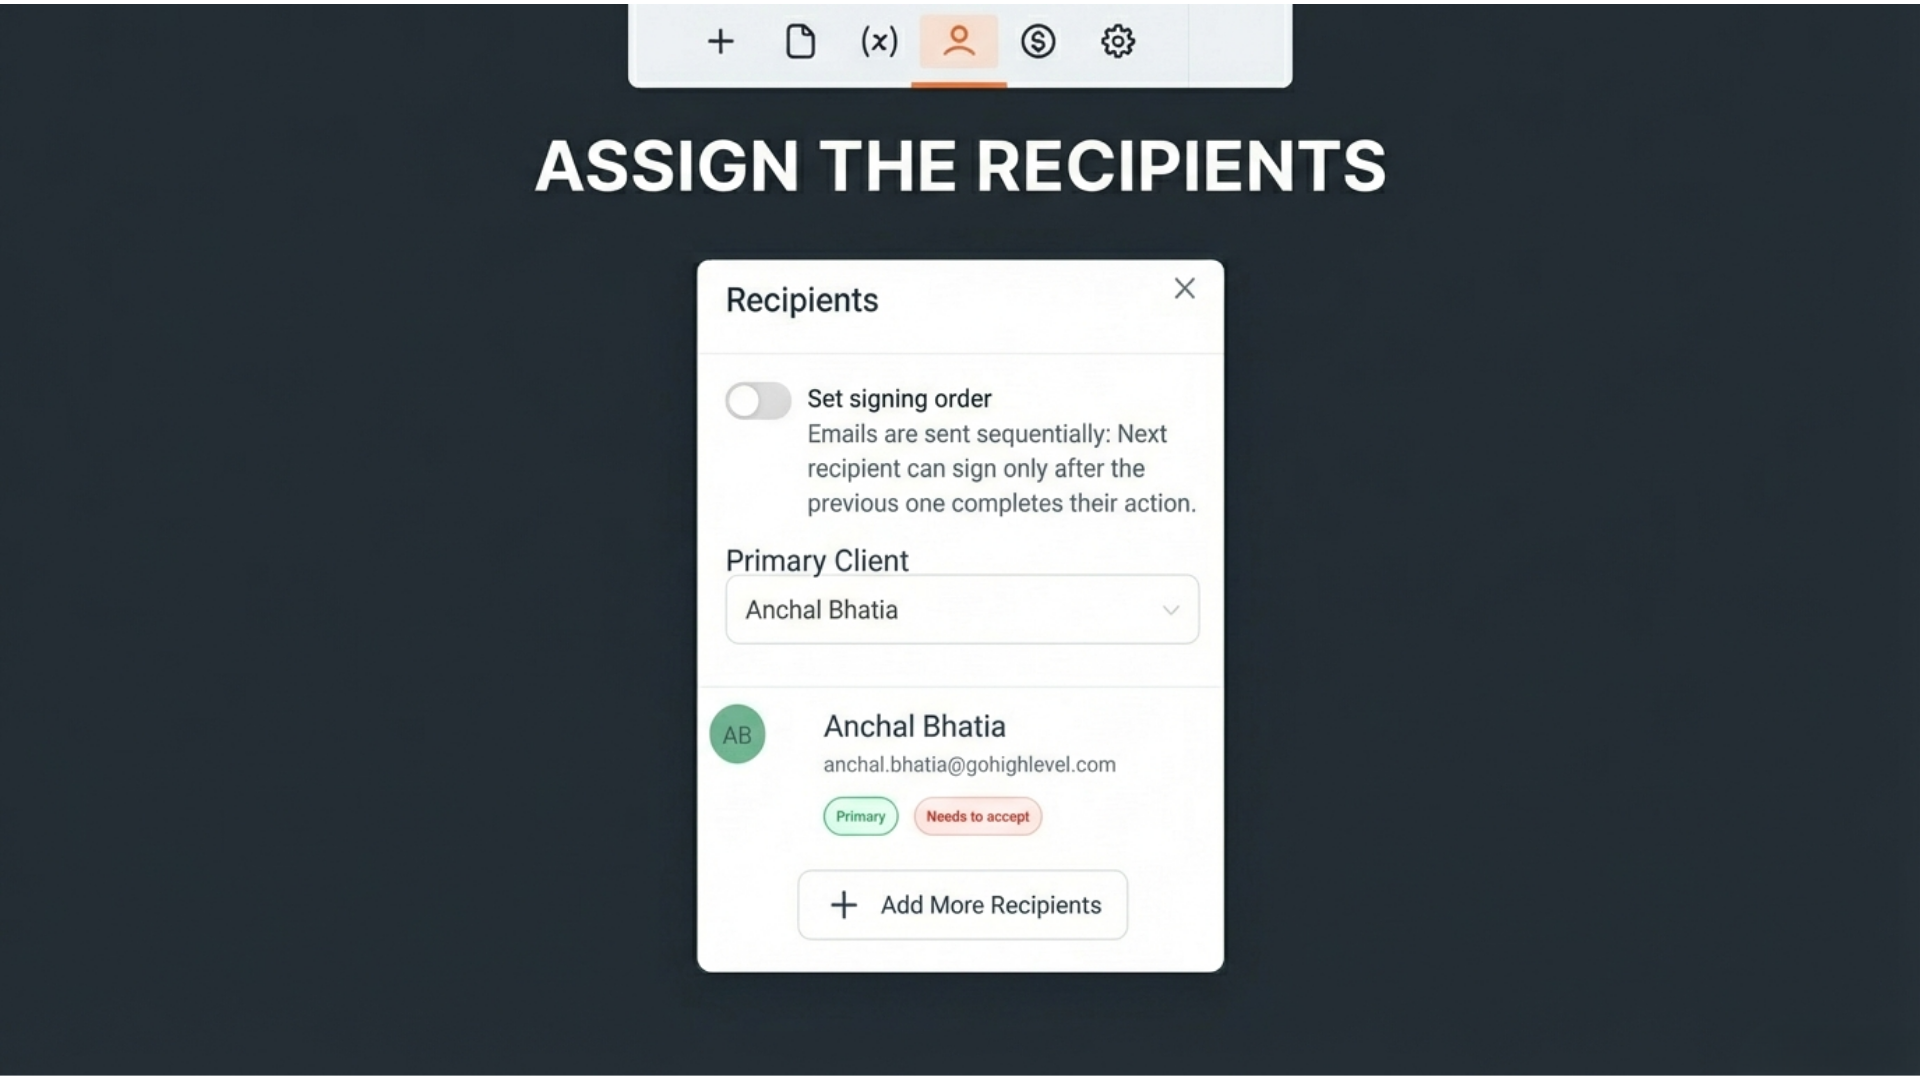
Open Recipients: On the right-hand sidebar of the editor, click the Recipients icon (the icon looks like a person).
Select the Person: Click Add Recipient. You can search for a name already in your People list or type in a new email address.
Signing Order: If multiple people need to sign, you can toggle the "Set signing order" switch to ensure Person A signs before Person B receives it.
Step 5: Using and Creating Templates
If you send the same "Facility Rental Agreement" or "Service Contract" every week, turn it into a Template so you don't have to rebuild it every time.
To Create a Template: Instead of starting in the "Documents" tab, click the Templates tab at the top of the screen and build your "Master Copy" there.
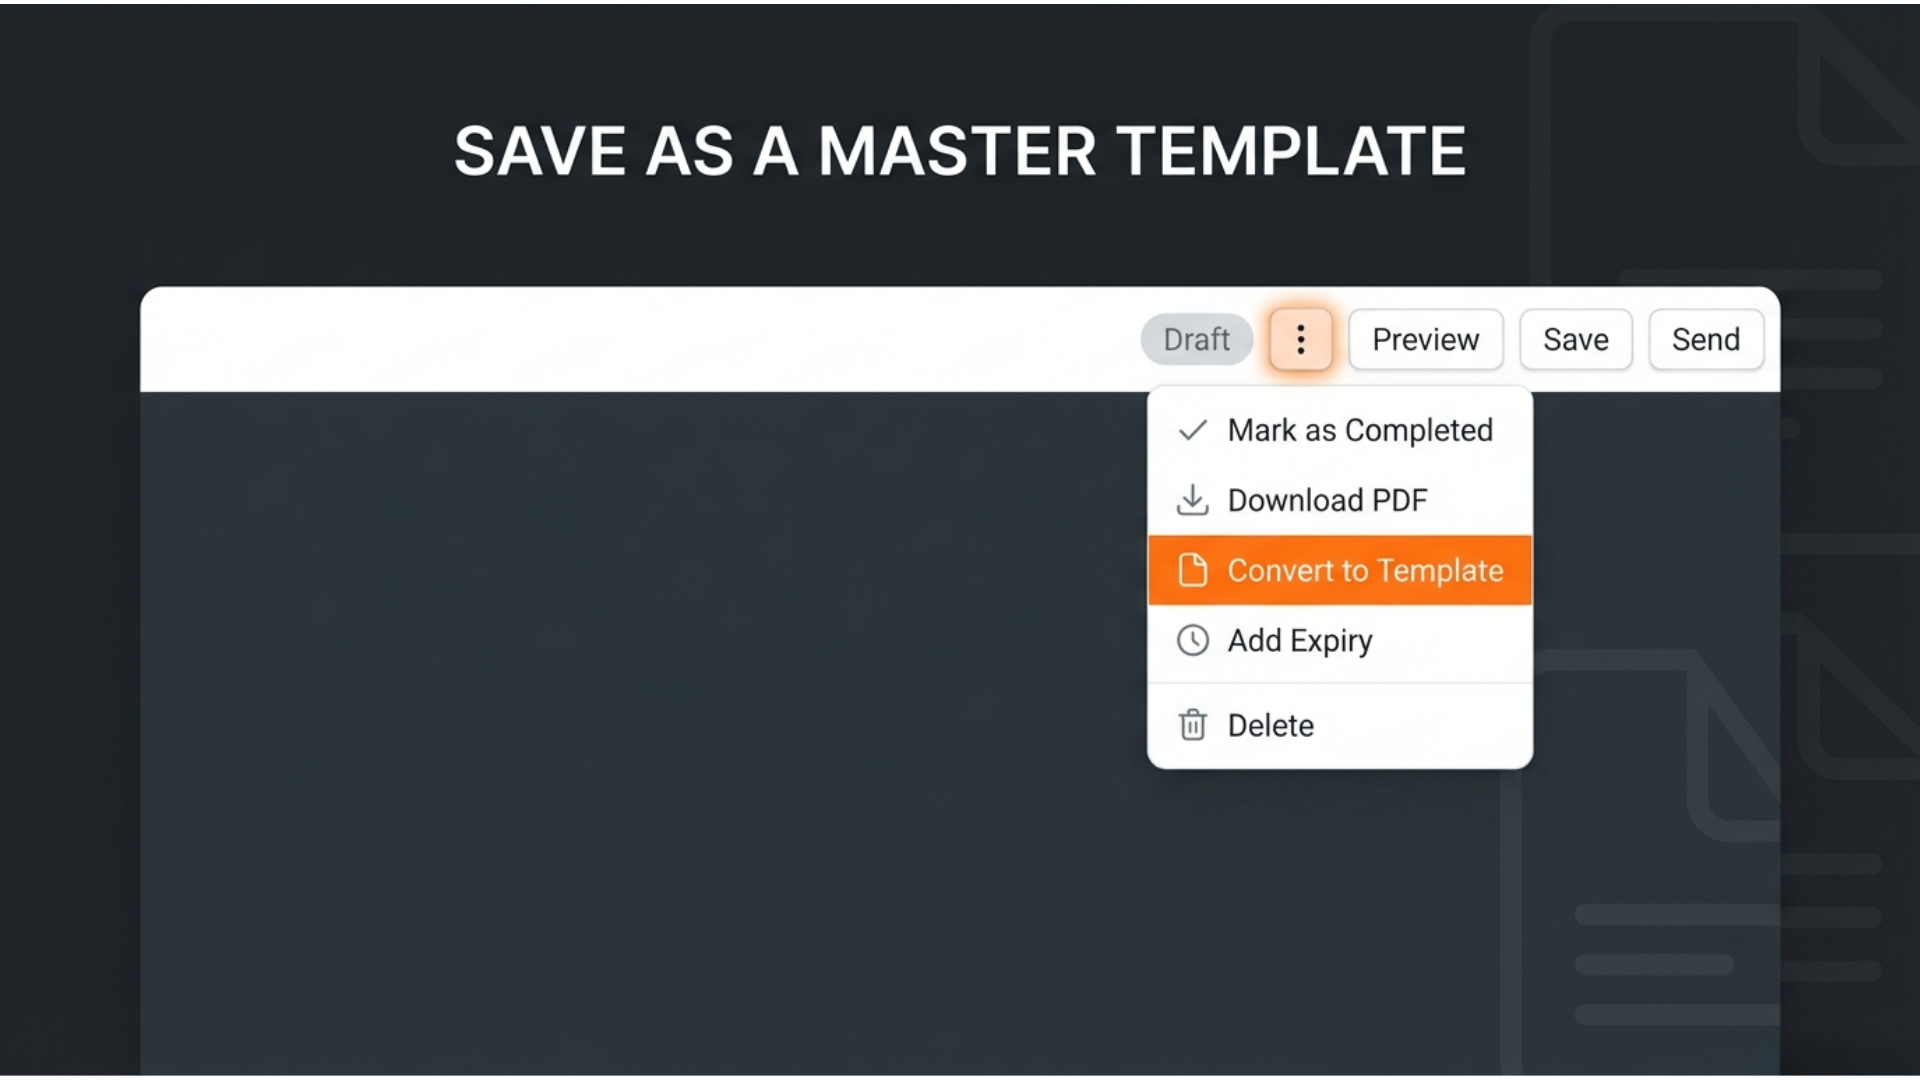
Convert an Existing Doc: If you just finished a great document and want to save it for the future, click the three dots (...) in the top right corner and select "Convert to Template."
Step 6: Sending and Tracking Status
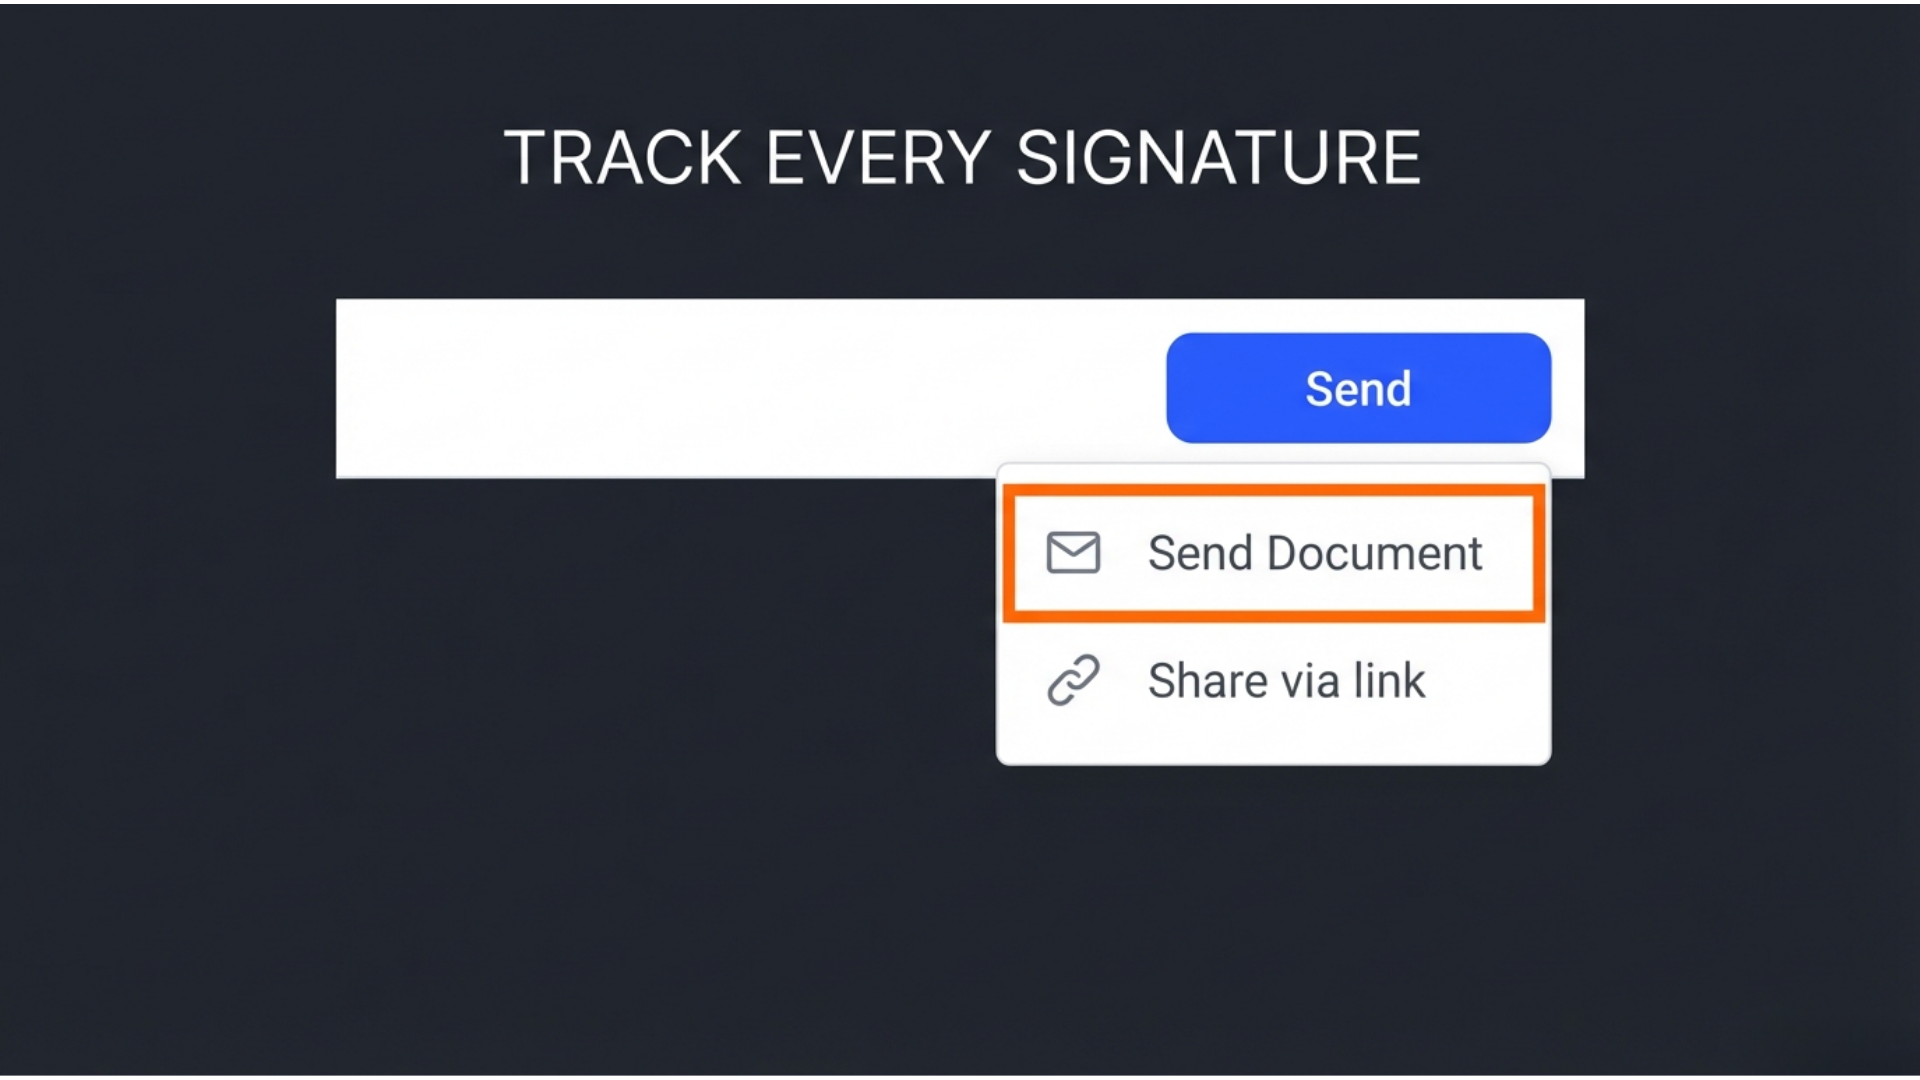
Once your document is ready, click Send in the top right corner and choose Send via Email. Back in your Document List, you can track the real-time status:
Sent: They haven't opened it yet.
Viewed: They are currently reading it (no more "I didn't see the email" excuses!).
Completed: It is signed and legally finished! Both you and the client receive a finalized PDF.
Mobile View: While you cannot build contracts on the phone, you will receive a notification in the Communication Hub the moment a document is signed, where you can view the completed PDF.